Sunday, April 10, 2011

Continuing work on the marble sculpture, and an angel sculpture for a Louisville show.

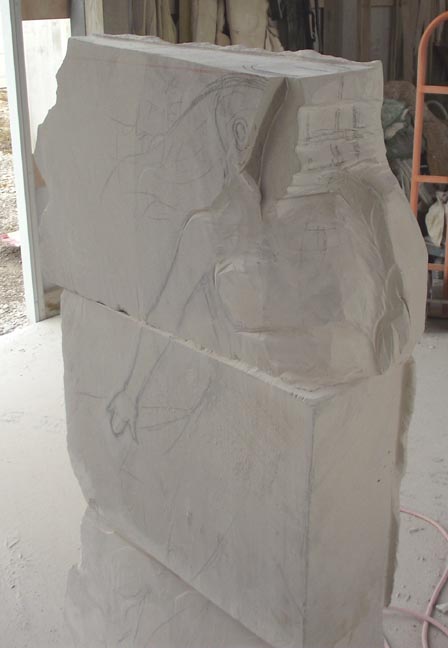
Work continues on the Marble sculpture, with continued refinement of hand face and leg. I am just beginning to work out where her left arm is. It will be lifting fabric away, the title of the piece is Lifting the Veil and deals with seeing beyond the "reality" of this world.
The crayon marks show where I think the arm will be. The very dark marks are for the view looking from her left side, showing where the profile of the underside of the arm might be. I will cut wide of any mark, the closer I get in to the form, the easier it will be to see where the arm really is.

This is her right foot. I am just beginning to cut the toes and work out the creases in the sole.

I have marked the areas that need to be removed, on the thumb and around the knuckles of the fingers.

This is an angel sculpture that I am doing for a show in Louisville.

Another creature with wings; I found this wasp in the window at death's door. So, I fed it a bit of soda with a bit of towel paper.

Before long, it was feeling better, cleaned itself and away it flew.

While I was feeding the wasp, I looked up and there stood a deer eating snacks....

Monday, April 4, 2011

Refining the figure, Otter in the basin and a river walk


Work continued on my Sylacauga Marble figure. The stone that I am carving does not have a lot of depth, so I have to be careful to fit the figure into it. Everything was fairly flat, requiring that I cut back areas that needed to be deeper. Also, I decided to cut back the front face of the stone to add dimension to the piece.

I had the foot too high and used a black crayon to visually remove the stone. I will now cut it off with an angle grinder.

Almost all the carving has been with grinders - 9" for larger areas, 4" for smaller areas and shaping. I also use a large die grinder with a mounted stone for interior and very small spaces. I have been steadily refining the sculpture; a little bit here, a little bit there. I want her arm to be lifting up fabric in front of her. I haven't determined exactly where the arm will be. I used a sander on the arm and face with 40 grit sandpaper. This is the first time that I've carved Alabama Marble - and I was curious about what it would do. I have carved Georgia Marble and some Colorado Yule. This is a very tight stone, with tiny crystals. It's great to carve and has a transluscent, fleshy quality.

I switched back and forth between the marble piece and the Otter fountain. I have hollowed out the basin enough to hold the bronze otter. I have roughed in the leaves and flowers of the lilies.

Another view...

The weather was so nice the other day, Don and I went for a walk by the Ohio River.

The path to the river goes by a field where corn was grown last year. This time of year lots of fields are covered with this purple flowering plants (some sort of cover crop) which makes for striking displays.

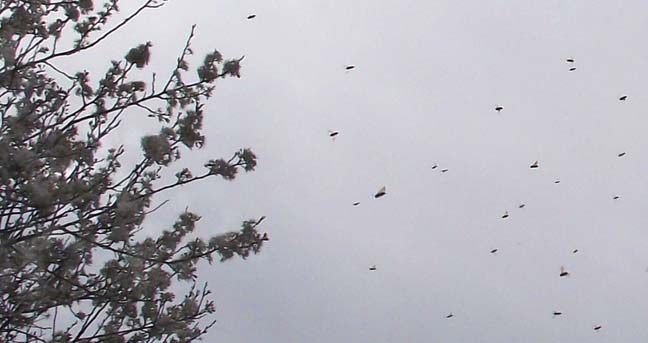
It was very windy, and these are bees were blown from the blooms of a plum tree where they were gathering nectar.

Tuesday, March 29, 2011

Figure in Sylacauga White Marble continues...

I roughly carve out the figure and use black crayon to indicate the profile of the face. At this point I had considered having both legs in front of her and have indicated that in crayon. I decided to fold her right leg under her and have removed stone to indicate the leg, leaving it roughly cut to indicate fabric. I have cut the profile of the face and have removed some stone from behind the head. I want to move the left leg over and indicate that in crayon. I also need to remove more stone along the line of her back to give her more depth. I crayon the center line of the face and the features. At the end of the stone, I mark where different parts (foot, elbow) are. I leave the foot intentionally wide, so I can move it left or right as the carving progresses. I remove the corners and some of the back of the stone with a 9" angle grinder, in order to open the stone more. Here she is, for now. The arm and hand are wide, for the same reason that the foot is wide. I may want to move things around as I finish. I work a little bit on various areas, like the face, foot and back, as I move toward a finish. Here is a little bumble bee that got into the studio and was anxious to get out. I got it onto a piece of paper and put it outside. Not sure what these are, but they are tiny. Each clump of blooms is only 1/2" across. Close up of a Twin-blade wildflower. The bears have been officially approved- from right to left is Mary Ann Pollard who commissioned the bears, Genie Lee her sister, Mary Ann's niece, Karen Coke, Lauren Wigginton and Lynnie Meyer, administrators from Norton Healthcare Foundation. On the far left is Katherine Vowels, who is responsible, not only for me securing this commission, but also the commission of the baby elephant sculpture (Ely) at the Louisville Zoo. Many thanks Kate!

Sunday, March 20, 2011

Otter fountain sculpture and carving Alabama Marble


This will be a bronze otter and limestone basin with waterlilies. I chose a fairly thick stone, so that I can make the basin deep enough to accomodate the otter. I use a 9 inch angle grinder to remove stone from the basin. But, it is difficult to work like this, so...

...we used the crane truck to turn it onto it's side. I can now more easily remove the stone from the basin.

Then, we turn it back up, so that I can finish the lily pads and flowers.

I am just starting to work out the flowers and leaves.

Don helps me with the bronze otter, so that I can see the way that it will fit into the basin.

This week, I started the Syacauga Marble sculpture by sketching on the shape with a timber crayon. I worked out a model, but changed my mind about what I wanted to do with the piece. So, I had Don take pictures of me in the pose before I began.

The side of the stone. I have marked out how deep various parts of the figure are - hand, head and shoulder, so I can refer to that as I carve.

The figure just beginning.

This figure has progressed, but I like to get away from a piece for a while by working on other sculptures - that way, I come back with a fresh eye.

We've had some flooding in the area; this is our neighbor's field.
The weather has been warm and flowers have begun to open...

Monday, March 14, 2011

Work progresses and the start of two more sculptures


One thing that I do, that helps me to work out a sculpture, is to take a photo of it and then manipulate the image in Photoshop. I used the pencil tool to add lines to see what areas that I need to remove. In the old days, I would take photos and have them developed and then draw on the photo.

This is the view from the front. I am working out where the leg needs to be. Also, her face and hair are too wide. I need to make the back thinner, but I need to be careful not to remove too much, as this is a stacked piece and I need to keep it fairly thick and substantial to support the top block.

I have started working out where the hand is going to be. The second block has a lot of extra stone protruding, which I am going to incorporate into the piece as drapery. This will be a lot more interesting than if it was cut off.

Another piece, that I am starting, is for the Yew Dell show in May. I am going to carve out a basin with lily pads for a lifesize bronze otter. This will be a fountain with water cascading over the side. The stone is a little big for the otter, so I need to cut it down. First, I drill with a hammerdrill....(photo Don Lawler)

My view of the drill.

I hammer feathers and wedges in to split the stone..(photo Don Lawler)

Another stone for Yew Dell- this is Alabama White Marble from Sylacauga Alabama. I will be bouncing between these three sculptures for the show.

We have had a lot of rain, and the lower part of the propery has flooded. Eddie calmly takes it all in.

A couple of goldfinches at the feeder.

Sunday, March 6, 2011

Work continues, trolley hop and bear approval


I cut the face from the side of the sculpture so that I can begin carving in the facial features.

I keep the face to check against to make sure the eyes, mouth, etc are in the right position.
I use a china marker to sketch the arm, hair,waist and skirt.

I begin forming the body with a 4" angle grinder. I cut around the arm as well. I start to lightly define the leg.

Switching off the stacked piece to Ophelia, I trimed off the edges of the stone using an angle grinder. I used a hammer to tap off the sections of stone to be removed.

We attended the opening of Chris Mozier's one man show at the downtown Bristol. Here are some of the other people attending. Excellent work with a mix of subtle colors with strong accents and interesting textures. Don and I were impressed.

Chris's show was during the trolley hop (first Friday) so we made the most of our Lousiville visit and went to several galleries - Zephyr, Pyro and we also ventured into Tim Faulkner Gallery- first time for us. There is an interesting group of work that can be discovered by exploring through various rooms.

We parked behind this facade of a building. I thought the light made for an interesting shot.

The man and woman who commissioned the bear came out to see and approve it today. They were very happy with the piece. I didn't think of snapping a picture while they were looking at the bear but I got this pic of their son, daughter and friends on our caboose!

Seldom do you see the red belly of the Red Bellied Woodpecker. Here it is...