Wednesday, February 22, 2012

Heron work continues, Daphne, frost on a spider web

I am refining various areas of the heron. When I made the heron legs they were somewhat rough, I go back with a soldering iron to refine them. I have done the leg on the left side, I have yet to smooth out the leg on the right.


The heron's left wing was a little heavy, I cut it back with a knife.


I use a metal wax tool to define the eye area. I then use the same tool on the beak to smooth and even out the texture.


I am trying out a bunch of plants with the heron. I like this better than what I had done in the model. Not quite right, though.


A side view.


I went over Daphne using a roloc (a small air=powered tool) with 120 grit sandpaper. I also smoothed out the bottom of the sculpture. Her left side is to the north and as a result is always in the shade. I need to turn her to the south so I can get the sun evenly on both sides.


We had a freezing fog the other day, thought this spider web encrusted with frost was pretty cool....


Monday, February 13, 2012

Tree of life molds depart for the foundry, The Heron progresses and The Brave Little Titmouse

The Tree of Life Molds are completed, now they need to be readied for their trip to the foundry.
Don puts the large mold section of the main tree trunk and branches together.


Each mold section is then wrapped in plastic to ensure they don't bounce apart in transit.


The leaf molds are then wrapped in discarded carpet padding we obtained from Fashion Floors in Ekron, KY. The shelf above is for the big tree mold to keep its weight from crushing the molds of the leaves.


R & L Trucking is then scheduled to pick up the crate.


Meanwhile, back at the Heron...


I roll out a cylinder of clay to make the toes of the Heron.


I pinch it with my fingers to make the clay and joints. Right now I am just roughing in the feet to check for proportion. I will come back and further define the toes.


I set the toes in place. I will check from different angles to make sure the feel is right.


In an earlier post I had feather sections to exaggerated, I decided to tone it down, making the general shape of the wing and then subtly cutting in where the feathers are. Right now I am just marking the feathers. I will come back carve the sections back.


I had the beak of the heron to wide at its base, I am cutting it back with a wood carving knife.


I have roughed in the plants and check the silhouette. I will play with the arrangement of the leaves, I am happy with the heron. I have removed the feathers on its head for the time being, I still need to work those out to my liking.


While feeding birds the other day I thought I would put some sunflower seeds in the Sea Lions mouth, just to see how long it would take for the birds to pick up on it. It took a couple of hours but then they realize - "Hey, there's seed in there." This is a Titmouse. It looks into the jaws of the predator....


and bravely sticks in his head!


Sunday, February 5, 2012

The heron continues, First Friday art and watchers at the window

I continue work on the heron, building up the wings.
I turn the whole bird on the armature so I can get to the underside. This is an important view as the sculpture will be above eye level and the underside will be easily seen.
I fill out the neck and body of the bird and start refining the face.
I use a knife to define the the beak. I have also used it to begin shaping areas of the head. It leaves a subtle pattern.
I have blocked in the wings and am determining the patterns of the feathers.
This is one of the blades of grass which will be behind the heron. I use a wooden dowel as a support.

Don and I went to First Friday in Louisville to see Bob Lockhart's and Mike McCarthy's new work. Bob has a number of really great 2D works. Each one has a humorous (sometimes disturbing) description with the work. It's really worth seeing, we were glad to make the 3 hour round trip to see the show.

Mike McCarthy is doing quite well and has a natural flair for stone. 8 of 10 pieces in the show had sold - he is well on his way and someone to watch.
Speaking of watching - this little deer was watching me as I took his photograph.
And a watcher on the window

Sunday, January 29, 2012

Heron sculpture begins


I begin the heron sculpture by building an armature with plumbing pipe, attaching it to a board with a flange. I used pipe left over from other jobs and , by chance, had the right length to have the "T" in the chest of the bird. I used 3/4" pipe for the main brace then used a reducer and 1/2" pipe and 1/2" "T" for inside the bird.

I then cut a piece of pink building foam into the approximate shape of the body of the bird.

I use a photo blown up to scale(the model is 6", the final sculpture is 24") of the finished piece to determine the position of the foam. Also,I have cut out a section on the far side of the foam to accommodate the plumbers "T" fitting through which I have placed a copper tube for the neck.
I don't glue the foam to the pipe, I use meat skewers at different angles to form a mechanical lock.

I cut off the skewers and begin to apply clay. This is a new clay I am using, Castilene. The hard version is like wax, yet when warmed can be modeled like clay.
I cover the body with clay...
I begin to form the head. I have also printed off a photograph of a heron to scale.

The heron blocked in.

I use the heat gun to warm the areas of clay that I have just added....
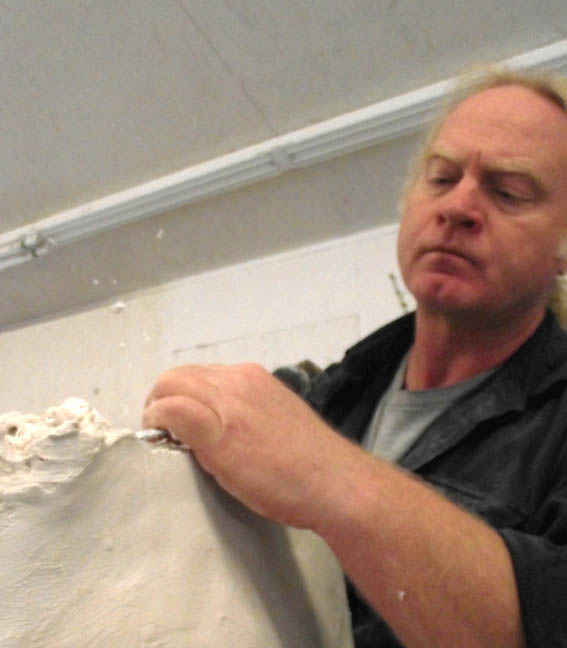
...then, use a flexible metal scraper to smooth the surface.
I begin to form the heron's face.

Birds come to eat the seed that I put on the window ledge.

Tree of life molds and a family get together

Don uses aluminum posts to stabilize the Tree of life mother mold, embedding them in the hydrocal.


After the mold is finished, the mother mold is removed...


and the interior rubber mold cut open. The armature is cut apart to fascilitate opening the mold.


The inside of the rubber mold - these are the roots of the tree.


Don has made a crate for his molds. The next step is to pack all the molds with carpet padding that Fashion Floors of Ekron KY allowed us to scavenge from their dumpster and then send it on it's way to Art Castings in Loveland, Co.


My family had a get together at my Lindsay's (my great niece, on the right of this photo). She lives in Carmel Indiana.


Carmel has a really nice arts district. This piece by Theodore Gall is at Evan Lurie Gallery. Each bronze sculpture opens to reveal various scenes. Really cool stuff.


I thought this was kind of interesting. On the top of the photo is a close-up of my hand with plaster residue. On the bottom is a frost pattern.

Sunday, January 15, 2012

Continuing the Mold work on Don's Tree of life and making the model for the heron sculpture

Daphne is on hold while the molds for Don's sculpture are finished. But it's good to take a break. Working too long on a piece makes it difficult to accurately judge what needs work and it's easy to make a mistake.


Back to Don's mold work on the Tree of life sculpture. After the mother molds have dried, they are opened using a flat chisel.


The rubber mold inside which must then be cut open.


The two sides of the rubber mold are opened and an exacto knife is used to cut through the first 2 layers of mold material. Don does a more thorough job of explaining the process on his blog http://restlessrocks.blogspot.com/


The shim acts a guide as I cut around the mold, separating the 2 halves.


The 2 sections of the mold. Next for Don's job is the mother mold for the tree itself.


Next, for me, is making a model for the heron I will be doing for Cave Hill Cemetery in Louisville, KY.


For the model I first print a sketch of the heron at a 4 to 1 scale to the final sculpture. As the sculpture will be 24 inches tall, that makes this sketch 6 inches from just below the feet (leaving room for a shallow base) to top of head. I am using hard Castiline which is a wonderful material. It works like wax and so hard I won't need to make an armature. I use pink foam for the body of the heron so it will be lighter - the legs are very thin and I don't want the sculpture to slump.


I heat the castilene with a heat gun and apply it to the foam body and make a neck. The castilene has a high melt temperature -160 degrees so you have to be careful when handling it not to burn yourself. It will get shiny when it gets warm, but do a touch test to make sure it's not too hot - it can burn you. Heat lamps will also work to heat the castilene, but they can also get the clay very hot, so be careful.


I then make the legs. The thinner the castilene is, the easier it is to keep it workable just from the heat of your hands. When the castilene is warm (not hot) it is fairly sticky so it's easy to attach legs to the body. Additional pieces of warm castilene are then applied where legs connect to firm up the attachment.


I make a small base for the heron and stand it up.


I form the plants that will stand behind the heron, using the sketch as a guide. In the final sculpture the plants act as structural support for the heron as the legs are fairly thin and fragile.


The model for the heron. The body of the heron is a little too horizontal, but that is easily fixed, I'll just heat it and make it more upright.


My niece, Beth just had her 15th birthday - she is on the left, her brother Danny is lighting the candles while his girlfriend, Olivia, watches.


Ice on the windshield.