Friday, August 15, 2014

American Lion continues

This is the rear end of the lion, it's well padded at this point.

The front view of the leg as well as being a little on the plump side, there is practically no definition of the muscles of the leg.  I crayon in the bony area of the leg first, I'll move on to the muscles later.

I am finishing the lion from the nose backward.  Everything in the body is too big - I always cut wide of the mark.  At this point I can push thing around a little bit - the form can be a bit higher or lower (by a couple inches or so).  By establishing the head first I have a starting point for finding the rest of the body.  I absolutely hate taking measurements from the model and finding them on the sculpture.  I much prefer to go by eye.  About this time I go back to the photographic reference I used to make the model. 

I define the left foreleg of the big cat.  I have actually moved it out, more in front than I had in the model - The more I lived with the model the more I felt that the left paw was too far under the lion and gave the lion a sense of being out of balance.

I draw the features of the lions face, I also begin forming the right foot.

After I mark the lines of the face I still cut wide - the chin is super wide, looks like she's smiling.

The lines are muscles the cross hatched areas are too high and need to be cut down.

Not only is the chin wide it is also too big over all.

more refinement of forms - I am also removing stone from over the lions head.  I am working over my head to do this and my arm gets worn out so I do as much as I can then go grind on a leg for a while.

more areas to be removed.

The lion is starting to come out..

The great thing about crayon is if I don't like it I can sand it off and try again.

More refined but it's got a ways to go.....

Sunday, July 27, 2014

Continuing the American Lion


I basically blocked in the profile of the lion (though everything is on the large side, I always cut wide of the mark coming back later to refine the work.  You can also see the shoulder is too high and needs to be cut down.

After measuring the model I mark where the leg is with a crayon.  I then cut the stone to be removed with a large angle grinder.  The "lines" on the stone are the cut marks left by the grinder.

I have removed some stone around the legs but cut wide and do not finish the legs.  I move to other areas that need to be refined such as the side of the head and neck.  I color these areas in with a black timber crayon.   The view for these areas vary - for the face and neck it is looking straight on at the face, the marking around the chest and foot is from side of the lion.


I use grinders to cut the left leg and paw in and create a lower ledge in the sculpture.  I like using the grinders to form the stone as they leave a clean surface, making the form easier to "read".

I usually start defining a sculpture's head before the rest of the sculpture.  This is how I started carving stone - I worked direct (no model) started at the nose and worked my way back into the stone.

I do continue to refine the rest of the body...

but the head remains the area I spend the most time on.

A view of the back corner before I have started forming the leg.  A lot of stone had to be removed around the shoulder and leg first.  A lot of it's on the ground.  Wheelbarrow is waiting to cart the chunks away. That is my least favorite part of this job, but necessary. 

The marks under the tail and over the foot show me what needs to be removed from this view.  The markings on the shoulder and cheek are areas that need to be removed from the view looking directly at the lions face.

The back leg area is really big- a lot needs to come off....

The tail area has been the least considered, but I'll get to it...

This is a huge number of caterpillars on a Morning Glory vine.

Wednesday, July 16, 2014

The Yew Dell Sculpture Show- really late in posting this, only 2 more weeks to see the show....

This sculpture I carved from Alabama Marble, is strapped to the knuckle-boom truck for the trip to Yew Dell Gardens for the 7th Annual Sculpture show. Her name in the show is "Lifting the Veil" but I have since renamed her for th Greek Goddess  Nyx.  She lifts her veil to look at the day and with it truth.


Mike McCarthy unloads "Francis" an over life-size carved limestone head.  There are numerous carved creatures to be discovered in his waving locks.

Music greeted guests at the opening.  In the foreground is work of Bob Lockhart's students which has been carved from soapstone.

This interesting piece in stoneware clay and limestone is entitled "Tri-Part" artist -Robert Pulley

These butterflies, which contrast wonderfully with their limestone bases and greenery behind are entitled "

David Waltz created this wonderful ceramic piece entitled "Expecting".

Karen Cunningham's "Wonky Doodle Dandy" sculpture created from limestone and steel makes a fun statement in the garden.

Shohei Katayama's sculpture entitled "Proximity" is composed of many mirrored discs which revolve, providing an interesting effect.

These two pieces compliment each other nicely. The vibrant, energetic colors of "I Jmpd in a Pil of Livs" by "Beverly Glasscock counterpoint the clean lines of "Morpher" by David Caudill.

Ed Hamilton was the featured artist of this years show. This wonderfully expressive sculpture is entitled "Sailor" is from a Civil War monument dedicated to African Americans who served in the war.

A pair of bronze sculptures entitled "Heaven" and "Earth" by Bob Lockhart.  The sun highlights the interesting folds- the pair is striking in the landscape.

A visitor to the gardens looks at "Phoenix" by Joel Pinkerton.  The sculpture features an acrylic lens.

People gather at the opening next to Karen Terhune's  playful cat sculpture.  It is carved from limestone and entitled "The Kiss"

Fred Millers "Running Legs" (aluminum and steel) make a bold statement on the Yew Dell lawn.

Don Lawler's sculpture "Levitation" combines limestone and neon.  The soft natural color of the stone is contrasted by the vibrant red.

This is my marble sculpture renamed "Nyx lifting the Veil".

This is a skylight amidst sedum in the green roof of Yew Dell's new Green House. 

Wednesday, June 25, 2014

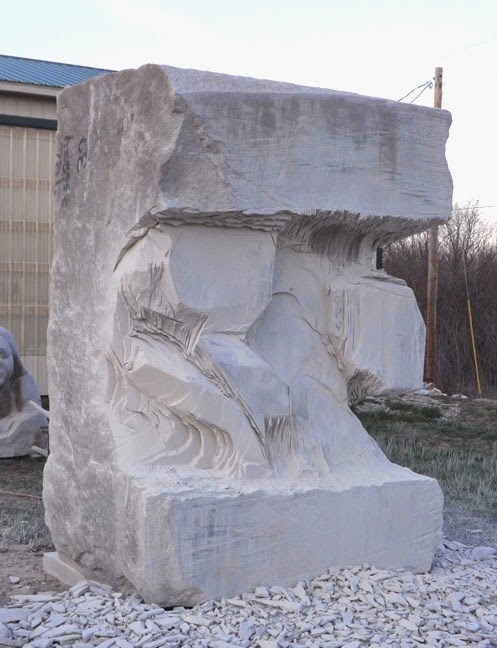
The American Lion continues

I take measurements from the model of the lion and mark the outline of the lion's head on the stone.  This shows me where I can safely remove stone though I will cut wide of the mark.

The sculpture looks really strange at this point, not at all like a lion, maybe some big bird.  I am cutting the stone in somewhat thin slices for removal as I am having some trouble with carpal tunnel (I am wearing a wrist brace) and it is bothered by too much force from the hammer I use to knock off sections of stone.  A thinner cut requires a lighter tap to remove.


It really looks like a bird from this angle.


I grind over the cuts I made into the stone so I can better "read" the sculpture.  The outline of the Lion is there but it is very flat at this point.  I will make measures from the model at well as sight-size to make sure of areas of stone that need to be removed.  Sight-sizing is holding up the model so that the model and sculpture are the same size to the eye and then comparing where different parts of the sculpture are and to see where stone needs to be removed.  A smaller model (12:1) helps in this as it is fairly easy to hold up, a 4:1 model can be difficult and cumbersome

I begin to form the head of the lion, grinding off corners and beginning to cut the planes of the head.  This is a technique I am most comfortable with as this is how I started carving stone - I would begin with the nose and work my way back into the stone.  I didn't have a great deal of strength then and had just begun using power tools so it was the easiest and safest way to create a sculpture.  It also takes the guesswork out of the carving - as you follow the form of the nose back everything else falls into place.

I have started to define the head (though it is on the large side am beginning to define the neck and shoulder.

I use a crayon to mark the area that needs to be removed to get back to the shoulder.

I have removed some of the stone from under the neck using a grinder then cut across it to get a clean surface.  Lots of stone needs to be removed from over the Lions neck..  The markings on the face show areas I need to remove and planes I need to strengthen.


I have used grinders to remove stone from over the lions head.  This is fairly difficult as I have to reach back into the stone as well work almost over my head - my arms get fatiqued quickly. 
The blocking of the piece (bulk stone removal) is almost complete and that is the most boring part of the job.  Now that the form of lion is emerging the work starts to get fun .