Sunday, January 17, 2010

Foam

After Don and Steve had made the armature, it was time for me to add foam, to take up the bulk spaces in the sculpture.

I got pink construction foam at Home Depots to use on the sculpture. It comes in 8 foot sections - kind of a problem to get into a car. I had a pocket knife ready to cut it down myself, but they had a saw there and offered to cut it down in 2 foot sections. How nice!

I measured the torso of the maquette and cut two blocks of foam to fit. I held each piece up to the armature and traced around it with a magic marker. I cut out the section of foam, so that it fit neatly over the pipe. I am using a light flexible knife to cut the foam. A heavy knife has a tendency to break chunks out, instead of cut.

I use Elmer's Glue-All to attach the pieces of foam to each other. I have used Liquid Nail in the past, but found that it crept into the clay. I prefer Elmer's, as it is non-toxic. However, it is messy and leaves lots of drips!

Here are two pieces of foam on the woman's armature. In the seam, you can see the glue that I have applied.

The larger pieces of foam have been attached to the armature. I will let the glue dry a little before trimming down the foam (so that it will be well within the finished sculpture). I measure various points on the maquette to make sure of this.

Wires are put into the pipe for the fingers of the hands.

I have trimmed down the foam and cut off most of the skewers - they will stay in the foam and act to stabilize it. I will add wires for the children's hands and foam to block out the little girl's dress. Then I will start packing on clay.

I drove out during the recent snowstorm to look for interesting shots. This is our neighbors house, just down the road. The Ohio river is right behind it. The house, on the hill behind it, is in Indana.

After a snow, it is fun to get out and look for tracks. These are on the creek. It has a great graphic quality; the tracks leaving dark marks in the snow and the white areas surrounding the tracks in the melting area of the creek. I think these are fox tracks.

Sunday, January 10, 2010

Welding the armature for the sculpture "Light of Hope and Healing"


Measurement are taken from the maquette, so that sections of the steel pipe can be cut to proper lengths.

Don grinds the ends of the pipe.

The pipe is shaped to make a better, stronger weld.

After determining the correct angle in which they should be joined, the pipes are clamped together with a vise grip.
Steve Mcmillen, a neighbor and friend, is doing the welding on this job.

Steve welds the pipe together. You can see an enlarged photo of the maquette on the wall.

The woman is the first of the figures to be welded up. Each figure will be welded separately, measuring against the maquette, to make sure that the angles of the armature are correct.

The man and woman are welded up first and will act to support the little boy and little girl. Here Don is determining where the little girl will fit in relation to the man's and woman's arms.

The joints of each figure are strengthened with sections of metal strapping. In this photo, the little boy is braced across the hips.

The armature is finished. I will block in the larger areas of the figures with foam. Wires will be inserted into the ends of the arm pipes for the hands. I will then apply the clay

I noticed some snowflakes on the car window and decided to photograph them. It was snowing at the time, that's why the snowflakes on the right are blurred. I thought it made for an interesting shot.

A deer comes up to help herself to sunflower seed I've put out for the birds - I don't mind feeding her as well.

Sunday, January 3, 2010

Studio move, and beginning the sculpture for the Hux Cancer Center


My new studio used to be the stone studio and it was filled with dust. Stone dust and oil clay do not mix; before I could move my sculpture materials in, the dust had to go. Our neighbor, Steve Mcmillen, helped us out immensely by cleaning out all the dust. After all the wheelbarrows of dust have been shoveled out, he used a leaf blower to blow out a good deal of dust. He finished up with a powerwasher, as you can see above.

I loaded everything into buckets (this is just a small part of my move). I have also brought my smaller sculptures (they are on the bench against the wall) to keep me company. The storage cabinets still need to be moved, so that everything can be put away.

I have to recycle the clay from the Home of the Innocents sculptures. The sculptures are cut down into chunks (see bucket on lower right), then the chunks are put into a pan, which is set on a heater (on left side of photo). It is
covered with aluminum foil and a towel which help keep the heat in. Heating the clay makes it soft and easier to work. I form it into small rolls, which go into their own bucket (top right of photo). As I form it, I remove any bits of foam or plaster left over from the last sculpture project.

Don and I went to Bark's Welding supply in Corydon Indiana to buy the pipe and welding rod for the sculpture.

Inside Bark's Welding Supply is the band saw on which the metal pipe was cut.

I had some people come in and model for me, to make sure that the scale maquette is accurate before enlarging. The life studies pointed out areas that needed improvement. (Subtle, but important for the final piece).

The first step in creating this work involves making the metal armature, which is a stick figure in the pose of each person in the sculpture.

These are the dimensions of the woman, measured at different points. The armature for the arms of the figures will terminate near the wrists. Wooden dowels and wire will form the hands.

My secret weapon for enlarging sculptures is the proportion wheel. It is actually designed for use in graphic arts to determine
percentage of enlargement or reduction. But, it's great for sculpture, as you can set your scale to any proportion. Find the measurement of your maquette on the inside wheel and then the measurement on the outside wheel tells you the measurement on the sculpture.

...and finishing this post with some wildlife shots. This is a Red Bellied Woodpecker on the sill of the old clay studio.

Here is a doe that was near the new clay studio. I managed to get a photo before she realized I was there and ran away....

"Oh, NO!" - Mr. Bill

Sunday, November 29, 2009

Studio Move and birds

I am moving the studio from one space to another (but the batteries are dead in the camera). I'll post pics in the next blog. In the meantime, I'm posting some of my photos that I find interesting.
After the dedication of the Home of the Innocents sculptures, we walked around Cave Hill Cemetery. I was amazed to see a Woodcock there. I didn't think they would be in the city.

I feed birds on the window sill of the studio, and so I have a lot of birds that come up to eat. This is, of course, a Blue Jay.

The other day, I opened the window of the studio to let out a huge number of ladybugs (should have taken a photo of that, ah well). I left the window open for several hours as it was a nice day, and this wren came in the window. It was really checking out the room, looking all over the place. It perched in front of the mirror, started singing, then attacked it's reflection -twice. It eventually left the room and I shut the window.


I took a walk down to the creek in the evening. I managed to catch this shot of a heron flying past at sunset.


While I was walking by the creek I took this photo of the moon and trees. It may look a little odd, actually it's a reflection. I have flipped the image horizontally to make it appear an actual shot of the trees...

I accompanied Don to Victor Oolitic when he went up to pick out some stone. While he looked around for something, I took photos of the stone blocks. Here I am looking through a stack of blocks at the sky.

I found this guy on one of the blocks, no idea what kid of beetle it is, but I thought he was pretty cool...

I found this miniature landscape on one of the blocks in the quarry. This formation in limestone is called Stylolite.


As we head towards winter there's not a lot of interesting things to photograph close-up. But this plant gone to seed looked interesting, with the sun behind it...

Friday, November 20, 2009

Home of the Innocents sculpture dedication

There was a preview party for the sculptures the day after they were installed. Hosted by Sharon Receveur, we had a lot of great food and we got to meet a lot of great people.

The dedication cememony began with Sharon Receveur giving words of welcome, followed by Home of the Innocents CEO Gordon Brown and then Linda Speed spoke. Sharon Receveur and Linda Speed were the catalyst for the project, and they gathered a committee for which this project was obviously a labor of love. Many, many hours were spent finding all the names of the children. They were a great group of people to work with.

Ciaran Brown played Sister Emily Cooper in a production called "Remember me"

Each of the child actors stepped forward with one of the names of the children. Some had a short description of the childs short life which ended with the question "Will you remember me?" It was a quite moving performance.

Becky Riddle unveils a historical marker about Sister Emily Cooper and her work at Home of the Innocents.

Doves were released as "Ascension" was unveiled.

"Ascension" unveiled. The prayer and blessing of the sculptures was led by Rabbi Stanley Miles of Temple Shalom and Bishop Reed. The Ballard High School Madrigal Singers gave a performance before the unveiling of "Ascension". Linda Speed is on the right in the red jacket.

Metamorphosis in her site. The butterflies on the blanket symbolize the children. THe sculpture represents how Sister Emily Cooper, through her care, symbolized by the blanket,helped the children achieve spirituality

Detail of "Metamorphosis." Here you can see how the butterflies transform from flat patterns to fully dimensional butterflies, symbolizing the children's spiritual transformation.

"Metamorphosis" from the left side.

"Ascension" from the front. This piece represents Sister Emilys work with children, guiding them to spiritual growth.

Detail of "Ascension"

The back of Ascension.

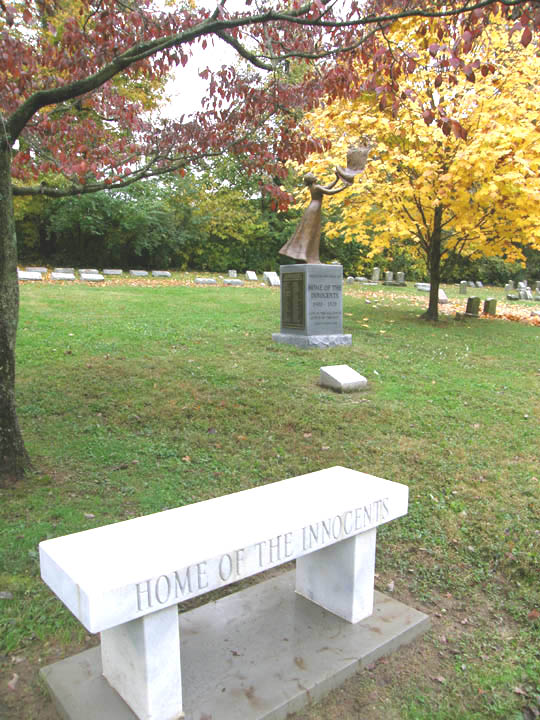
Cave Hill Cemetery donated this marble bench near Metamorphosis as well as a bench next to Ascension. They beautifully set off both sculptures.