Friday, April 19, 2013

"Discovery" continues....

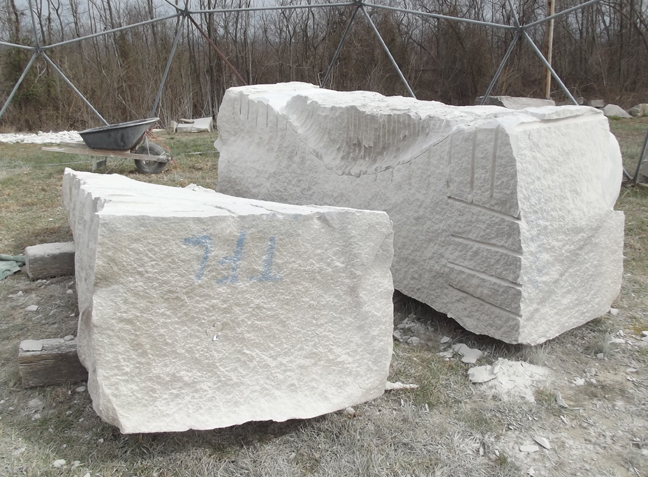
A section of stone is split from the stone which will be the right arm of Discovery by drilling and splitting the stone.
The basic form is carved from the stone using an angle grinder.
Slices are made with the grinder and then each slice is removed with a hammer and chisel. It takes several passes to get to...
the basic outline of the sculpture.  At this point the stone is on it's side.  You are looking at what will be the bottom of the right arm. The hydraulic chainsaw was used to cut off large corners of stone.
The stone that will be the lower leg is marked with the the outline and then stone is removed with an angle grinder.
The hydraulic chainsaw was used to remove a large corner of stone.
The top of the leg is too difficult to cut with the chainsaw and so it is removed in slices.  The angle grinder can cut about 4 1/2" deep.  Multiple cuts a couple of inches apart and 4 1/2" deep are made and then removed with a hammer and chisel.  The stone strips are then loaded into a wheel barrel and are removed.
I use a square (right angle measuring device) on the model measuring back from the tip of the nose to the top lip, to the lower lip and to the chin. Then I use a framing square and a ruler to be certain of the amount of stone I need to remove. I use a 4" grinder with a diamond wheel to remove the stone.


After cutting around the chin I continue around to the other side of the face. 
I recently went over to Bernheim Arboretum  to visit a piece I have there and saw Matt Weir constructing his sculpture. It is a multiple component piece and will be finished a little later in the year.  I'll post photos when he's done.  I have seen models of the work, it will be really cool when it's finished.
This is my piece, Emerging which was installed in 1997.  This piece and two other "stacked" pieces are the basis for "Discovery" as well as "The Muse"  By carving only small sections of the figure (head, hand knee and foot) I was able to create the illusion that the figure was within the three blocks of stone.  In the same way the head hand knee and foot of the "Awaking Muse" gives the illusion that her form is beneath the sod.  So effective that I have been asked if the stone continues beneath the grass.

It was raining and that is why the exterior and interior are so starkly different. Now it looks as if the figure is crouched in the stone, looking at the rain...

My twin sister and I recently turned 50.  That  would mean 100 candles on the cake.  But, it was decided to celebrate our birthday with our brother, his birthday is two days later and he turned 61. So we had a cake with 161 candles.
Here is the video of the flaming cake ....


These are Blue-eyed-mary plants, putting on quite a show....

Sunday, April 7, 2013

Starting the face of "Discovery"

After the stones are moved away from the block, work can begin on carving the face. At this point sections of stone have been removed using a hydraulic chainsaw.  Now angle grinders with diamond tipped blades will be used to remove stone.
The first thing is to be done is to find the tip of the nose.  This is the position furthest out on the face.  Measuring on the model (how high up and how far over from the left side) a mark is placed on the stone. The relative position of the point of the chin is also determined (though it is much further back from the nose) so that an axis can be determined and a line drawn to represent this axis. Measuring over from this line,another line, parallel to the axis line and just past the edge of the face is drawn.  From that line to the edge of the stone is a section of stone that can safely be removed and the side of the face roughly carved in.
A side view of the stone removal from the side of the face.
I measure the distance from the nose to the forehead on the model, this tells me I need to remove about 6 inches of stone. The line across the top of the stone and down the side is the cut I will make.  The marks across show the area I want to remove.
I use a 9 inch angle grinder to cut strips off. I then use the grinder to cut the surface flat.  The flat surface helps me to get a better measurement.
Some of the stone has been removed, there is still more to go...
The nose needs to be cut back at an angle, I have drawn the line to cut on the stone (it's a bit hard to see).


The nose is angled back, Now I need to taper the sides.
Lots more work to go, but she's on her way...
This is the bottom of the left arm.  An outline of the model was graphed out then that graph was drawn onto the stone.  Then the form has been partially cut out.  Eventually, a crane will be brought out to right this block so that the piece can be finished.
It's finally spring.  The winter wasn't too bad, not very cold or much snow it just seemed to go on forever.  Now at last temperatures are pleasant and flowers are blooming again.  This is a stand of  Henbit.
Deer come to eat the sunflower seed and cracked corn I put out for the birds.
I thought this halo around the sun was interesting.....

Wednesday, March 27, 2013

My Proposals for Anchorage Alaska have been submitted, Large sections of stone removed on "Discovery"

I am a finalist for a public art commission in Anchorage Alaska and have submitted my proposals to the committee.  Time will tell if I will receive the commission..until then, work continues on "The Discovery".
 This stone is for the left arm of "Discovery"  The raw block is significantly larger than what I need so two sections will be split off.  First the stone is drilled (holes about one foot deep) then metal wedges are placed in the holes between metal devices called feathers.  The wedges are hammered in with a large hammer.  The feathers act to spread the stone apart. The wedges are hammered again and again and again and again. (you get the idea, a long time)
 Then you hear a deep "Thunk" which means the stone has cracked and then it's just a few more hammerings and it splits.  Of course it doesn't just fall over like this, a pry bar was involved and a handful of boards before the stone was convinced to "fall over"/
 The process is repeated for another section of the stone.
 Stone removal on the head has continued as well.  These cuts were made with the hydraulic chainsaw.
 The stones are piling up around the block.  They need to be moved before further work can continue, so...
 The pieces of stone are rigged up...
 and loaded on the truck.  They will taken to the "yard" where the raw stone is kept.
 Partially, loaded, just a couple more to go....
We have had unseasonably cold temperatures and it has snowed very late this year.  This O'Possum is normally nocturnal but it made a few day time appearances lately, coming to eat the sunflower seed I put out for the birds.  I don't mind feeding 'Possums, I think they're kind of cute....

Tuesday, March 19, 2013

The new project begins

The new project "The Discovery" has begun.  Some of the stones are much larger than their final form.  They are carefully measured and then large areas will be split off.  One technique for removing large areas of stone is by drilling holes and then hammering feather and wedges into the stone to split off a large section.  The holes are made with a hammerdrill. Each hole is about 16" deep
 This block will be one of the arms of the giant reclining woman.
 This block will become the right leg and foot.  The flattened area will be the bottom of the piece.
 The block of stone pictured above will be the head of "The Discovery".  The front corners need to be removed and for that, the hydraulic power unit and the hydraulic chainsaw come into play.  The saw (sitting on top of the stone) can cut 18" into the stone.  Careful measurements from the model head were made.  These measurements showed were corners could be safely removed from the stone. The lines for the cuts were first marked with crayon (see earlier post) and then an angle grinder.
 The chainsaw has made it's cuts.  After the corners were cut all around - each side and then from the top, wedges are inserted into the cut.
 The wedges are placed in the side and top of the stone.  The ideal place for the stone to fall is straight in front of the block. That is why the wedges are being struck on the left side instead of the right, I want the stone to fall forward.  Let's hope it does...
 The wedges are hammered into the stone. As the wedges are hammered deeper into the stone the sound changes, each time the hammer hits the there is a pinging sound.  That sound changes the deeper the wedges are driven into the stone until there is a dull sound when the wedges are struck, that signifies a crack has been made and it won't be long until the rock splits off...
 I switched over to a sledge hammer, the small hammer didn't have enough power.
 It is a nice, cleanly split stone, some day it will become a sculpture.
 I set the wedges and hammer them in to take out the next corner....


Success!
Catrina pretends she is a mighty lionness. The deer don't appear disturbed...

Tuesday, March 12, 2013

The new project, the stones come in


This is my new project. She is a forty foot long earthwork and limestone sculpture entitled
"The Discovery"  a young woman gazes at someone sitting in her hand.  Is it you? 


The project is for See Art Orlando in Orlando, Florida.  I am one of 7 artists selected to create public art for the city.  See Art Orlando is a public/private partnership in which private donors sponsor the public art commissed and then donate them to the city. 
Here is a link to the site-

and here is a link to a newspaper article about the artists selected -


Three trucks from Stonebelt Trucking in Bedford, Indiana, brought the stones to the studio.  And a 90 ton crane from Bramer Crane was there to meet them.


Kevin operated the crane.  We set the rigging to unload one of the stones.


Jeromie, the rigger, also from Bramer Crane, watches the stone as it is lifted off the truck.  This stone will be one of the arms.


Jeromie steadies the load as it comes down onto the timbers.  This stone will be the knee.  The whole project is huge but it was decided before the stones came in where each should go and timbers laid out for each one. It was a long day but all the stones were put in their proper place.  Many thanks Bramer Crane and Stone Belt!


The next step in the job is determining the points of the sculpture.  Pins are placed to determine high points.


The stone fits the model perfectly. This is the top of the block the face will be in.  The circle with the cross in it corresponds to the pin in the top of the model.


This is another of my "fun" shots.  It is the glass lid of a pan with condensation from steam.