Showing posts with label stone carving how to. Show all posts

Monday, March 19, 2012

Detailing the heron, more mystery sculpture, jailhouse pizza and a dancing Timberdoodle video

I turn the piece to get different shadows to check surface - the back is too uneven, I have to add clay to fill in some of the depressions.


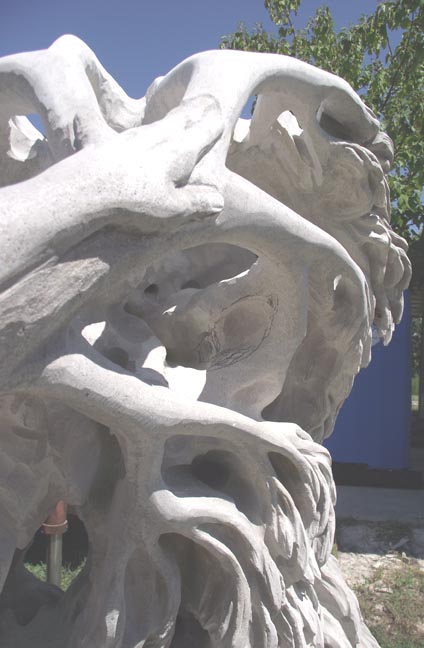
I go over the surface with a wood carving knife which leaves these crumbs which are easily brushed off. I'll go over the surface a couple of times turning it in the light until I'm satisfied.


I have redone the feet, slimming the toes and making the claws more refined. The feet need just a bit more tweaking.


I carved the pupil of the eye with a loop tool.


Here the the heron, almost finished. I am checking and rechecking various profiles before I go on to add the long thin feathers on their heads, back and chest. I am going to try different variations to see what I like. I tried melting the clay onto waxed paper and cutting it into strips but I didn't like the sharp edges when on the body or neck. Didn't look too bad on the head though.


These are bits of clay rolled out. These aren't bad for the body but I'm not crazy about it for the head....


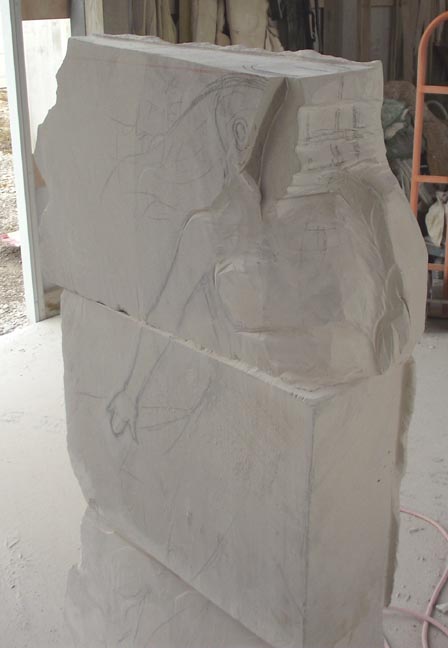
And now on to the mystery sculpture. This is the model for the piece. It will be an earthwork/stone combination, a little girl from the waist up, plants across her mid-section and stone legs on the other side of the earthwork. The holes on her face are from marking the axis of her head. I am using the model (it is roughly 15:1) to establish her right cheek on the stone. I hold the model so that it lines up with various points on the stone (it's hard to get it to line up properly with the camera) . Then I hold a china marker on the area I want to mark, then....


I remove the model and then walk over to the stone and mark the area I want to carve. If you look closely you can see I have already marked the area I need to remove to define her cheek. It's best to check a couple of times and just to be really certain, take measurements from the model. I always cut way wide of the form, trying to avoid "Oops" moments.


My twin sister Liz (left) came for a visit with her little boy Joe (center) and her daughter Beth (right). We ate lunch at Jailhouse Pizza in Brandenburg, KY. We toured the old jail cells while waiting for our food. There is even a gallows which is kind of creepy. They have tables and chairs in the cells if you want to eat in there, though no one ever seems to, it's just a bit claustrophobic....


And I have posted my first video on Youtube - It's this Timberdoodle seeming to dance across the road to Silly Love Sond by Paul McCartney. Timberdoodles bob up and down, nobody is really sure why. Here is the address http://www.youtube.com/watch?v=txW9Jj5yISo


Sunday, August 14, 2011

Daphne continues

It was nice to get back to Daphne. It has been a long time since I've worked on her and it was obvious which areas needed work.... The branches were far too rough, so I smoothed them using a pistol grip sander with 120 grit sandpaper. The branch on the top right has been sanded and is smooth. The next branch over has not been sanded and shows the marks from the die grinder which I used to carve them...

In order for the sculpture to be so airy, I had to use a large hammerdrill with an 18" bit. There are some areas where the drill holes are still apparent, as in this photo. Where I can, I will work these out.

The same area, after using a large die grinder. I may not take out all of the drill marks, but will blend what is there into the sculpture.

This is the back of the sculpture. I have been working out areas of roughness and chisel marks. Overall I am happy with the appearance, as it has the swirling aspect I was going for. I will probably do some deep carving around the bottom of the leaves to darken the shadows.

I crayon the area beneath the leaves where I feel extra depth is needed.

This is an area that I felt was too heavy and needed to be split into two branches. I marked the area with black crayon, stood back to check how it would look and then opened the area with a die grinder.

I am doing the same thing on the other side of the sculpture. The area that I am opening is just below the hand. Look closely for the black crayon marks.

I have sanded over Daphne's body and face. I still need to finish out details - eyes, lips, etc.

I have cut more shadows beneath the lowest leaves. I may add some deep shadows in the leafy section in the lower part of the sculpture. There is an area in the center that lacks definition .

This is probably my favorite view - I like the way she is twisting -though it's hard to read her form against the building in this photo.

I was going to the truck, leaving for the day, and there was this fawn just standing there. It stood still for a while, not sure what to do, so I was able to get this pic. It wasn't long before it turned and ran away.

Sunday, March 6, 2011

Work continues, trolley hop and bear approval


I cut the face from the side of the sculpture so that I can begin carving in the facial features.

I keep the face to check against to make sure the eyes, mouth, etc are in the right position.
I use a china marker to sketch the arm, hair,waist and skirt.

I begin forming the body with a 4" angle grinder. I cut around the arm as well. I start to lightly define the leg.

Switching off the stacked piece to Ophelia, I trimed off the edges of the stone using an angle grinder. I used a hammer to tap off the sections of stone to be removed.

We attended the opening of Chris Mozier's one man show at the downtown Bristol. Here are some of the other people attending. Excellent work with a mix of subtle colors with strong accents and interesting textures. Don and I were impressed.

Chris's show was during the trolley hop (first Friday) so we made the most of our Lousiville visit and went to several galleries - Zephyr, Pyro and we also ventured into Tim Faulkner Gallery- first time for us. There is an interesting group of work that can be discovered by exploring through various rooms.

We parked behind this facade of a building. I thought the light made for an interesting shot.

The man and woman who commissioned the bear came out to see and approve it today. They were very happy with the piece. I didn't think of snapping a picture while they were looking at the bear but I got this pic of their son, daughter and friends on our caboose!

Seldom do you see the red belly of the Red Bellied Woodpecker. Here it is...

Wednesday, February 2, 2011

Finishing touches on the bears.


For the finish work, I employ halogen worklights. One pair is up on scaffolding, the other on the ground, to help me see areas that need just a bit more work.

I am nearly finished with this area, just a bit more cleanup necessary.

I use a china marker (basically a black crayon) to mark where I need hairs, and notes about what needs to be done in an area. The note says "edge" and has arrows pointing to the nose indicating the edge needs to be more rounded. Crosshatching means an area is too high.

I have marked where I need additional hairs with the black crayon and have further deepened the crease under the mother's chin and neck.

This is a small flat end burr that I use to create a deep shadow under the mother's chin and neck.

I use a point burr to add fur texture in creases.

I also use it to clean up areas around the eye.

It was a foggy day at the studio....

I feed birds, and today while I was putting out seed, I came upon this possum looking for snacks. I stayed very still - they have terrible eyesight -and watched him as he foraged for food. He would walk along, then suddenly turn to root around in the leaves and eat whatever morsel he found. He came very close to me (just a few yards) never realizing I was there.

And then, he wandered away.

Tuesday, July 27, 2010

Carving the Grizzly and Ely SOLD!

This is the left side of the bear. I have been removing stone from the rear leg of the mother bear. Under the mother's foot you can see (if you really use your imagination) where the cub clinging to it's mothers leg will be.


A great deal of stone needs to come off around the bears back legs. The block is also too long and needs to be cut down. At the bottom of the stone, on the right, is a quarry dog hole, which will need to be cut out. These holes (there are two for every block) are made for quarry dogs, metal tong-like devices which are used to lift stone out of the hole. Cutting out the hole was awkward as the bear curves under and I needed take out just enough to get rid of the hole. I kept thinking I was done, but the hole was packed with gravel. It just went on and on. I finally got it, though.


I am using an angle-grinder with a diamond wheel to make cuts into the stone. I make a series of cuts (you can see these cuts under the wheel of the grinder) and then break them off with a hammer. Sometimes, I cut the sections off with the grinder by cutting across at a right angle.
I use a hammer to break off cuts of stone.


A little piece of stone (lower right) got in my eye while carving. I thought that I'd share this with you.

Great news! Ely sold at Yew Dell Gardens!


These are blackberries. I never realized that they had these coverings. I searched for what these coverings might be called, but had no luck. They look cool, though, like Sundew plants.